Pigment Textile Printing - Fabric to Finished Product

Pigment textile printing follows a six-step process: fabric inspection → pretreatment → digital printing → drying → heat-fixation → softening. No washing step is required. This guide walks each step with the production parameters that matter.
Step 1 - Fabric inspection
Before production, check every roll for:
- pH value - must be within ink-compatible range
- Absorbency - affects pretreat dosage and ink consumption
- Weft skew - skewed fabric causes registration errors on R2R lines
- Surface cleanliness - dust, oil and loose fibres degrade print quality
- Edge condition - frayed or damaged edges affect feed stability
Reject or rework fabric that fails inspection - bad input fabric is the single most common cause of “mysterious” production failures downstream.
Step 2 - Pretreatment and sizing
A typical pretreatment formula uses ~5% modifying liquid diluted with water, applied and dried before printing. The pretreatment:
- Improves color yield
- Sharpens pattern edges
- Stabilizes fixation
- Reduces ink consumption per m²
Adjust the dilution per fabric type, ink system and target fastness. Verify the pretreated fabric is fully dry before it reaches the printer
- residual moisture causes ink bleed.
Step 3 - Digital printing
Print in a controlled environment:
- Temperature: 20–30 °C
- Humidity: 50–65% RH
Outside these limits, water-based pigment ink dries inconsistently on the fabric surface, producing color variation and patchy underbase coverage. Climate control is non-negotiable for production-quality pigment printing.
Operational checklist during print:
- Ink supply levels monitored
- Printheads clean (daily nozzle checks)
- Nozzle status verified before long runs
- Fabric tension and feed alignment consistent
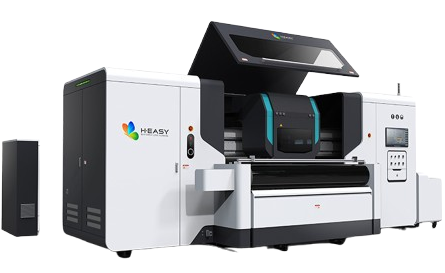
For industrial-scale pigment printing, see the H-Series R2R printers - 1.8–2.6 m Ricoh Gen6 platforms with constant-tension feed and auto web guiding.
Step 4 - Drying after printing
Reference: 140 °C for ~5 minutes (adjust per fabric and ink system).
Drying removes the water carrier from the ink, leaving pigment and binder ready for the fixation step. Under-drying carries water into the fixation chamber and disrupts binder film formation. Over-drying risks fabric yellowing or shrinkage.
Line speed and fabric thickness drive actual drying time more than the reference temperature - confirm with sample fabric on the production line.
Step 5 - Heat-fixation (the core step)
Reference conditions:
- 130–150 °C for 4–6 minutes, OR
- 170 °C for 4 minutes
During fixation, heat enables the binder to form a thin film that bonds pigment to the fabric surface. This is what gives pigment-printed fabric its washfastness - without it, color washes out on the first laundry cycle.
Fixation is the most production-sensitive step:
- Under-fixed: color washes out, binder doesn’t cure
- Over-fixed: fibre yellows, hand stiffens, binder crosslinks too far
Calibrate fixation per fabric and ink combo using actual sample testing, not generic guidelines.
Step 6 - Softening treatment
Pigment-printed fabric can feel stiff after heat-fixation because the binder film adds a thin polymer layer. Soften via:
- Softener wash - mild surfactant rinse (still much shorter than a reactive wash cycle)
- Softer binder system - choose ink chemistry tuned for soft hand
- Optical softener finish - chemical treatment that doesn’t disturb the binder
Balance softness against durability - over-softening can reduce washfastness.
Why no washing step
Unlike reactive, disperse and acid printing, pigment printing doesn’t need a wash step to remove unfixed dye - there’s no unfixed dye to remove. The binder fixes everything in place during heat-fixation. This is what makes pigment printing structurally cheaper in water, energy and labor than the alternatives.
See how no-wash pigment printing reduces production cost for the full cost comparison.
Conclusion
A pigment textile production line is genuinely simpler than reactive, disperse or acid setups: inspect, pretreat, print, dry, heat-fix, soften. The trade-off is investment in process discipline - pretreat dosing, ambient humidity, fixation calibration - rather than investment in wash and steam infrastructure.